How do I connect to a network printer from a Windows machine?

  1. Go to settings then open devices and printers and click on the “Add a printer” option.
  1. Click on “The printer that I want isn’t listed”
  1. During this step you will need to know the full network address for the printer. Be sure to choose the “Add a printer using a TCP/IP address or hostname” option.
  1. Enter the hostname of your printer then click next.

How do I print to the high volume printers from a Mac?

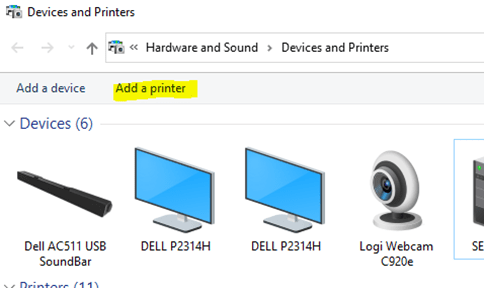
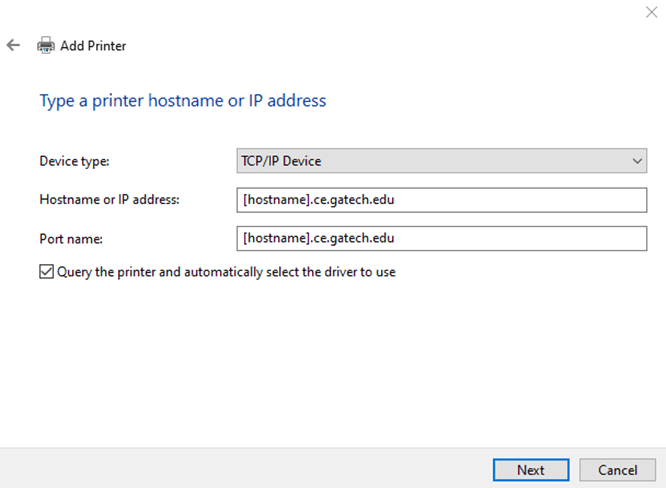
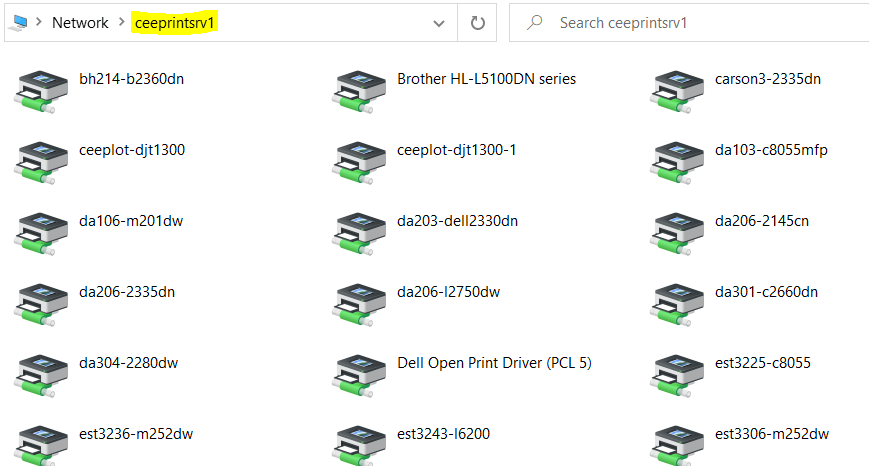
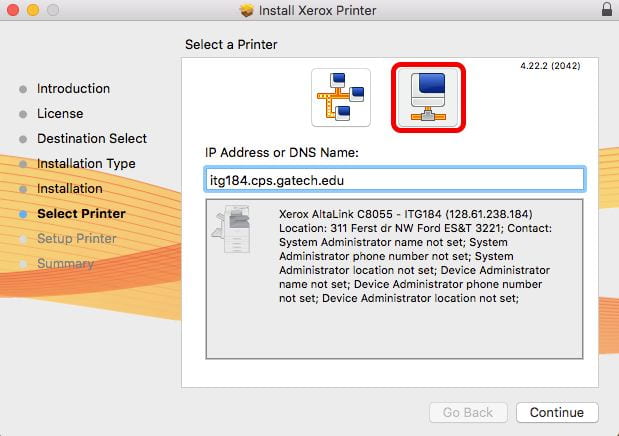
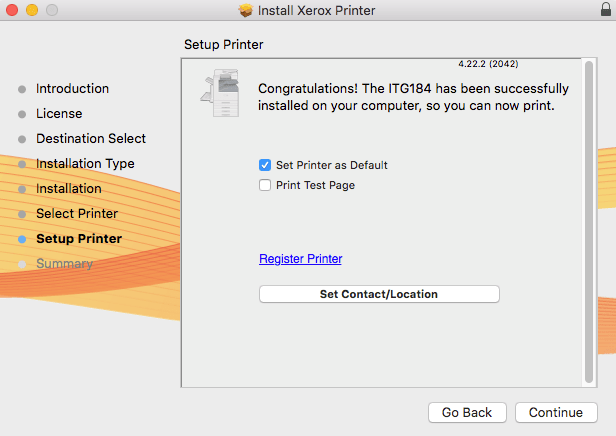
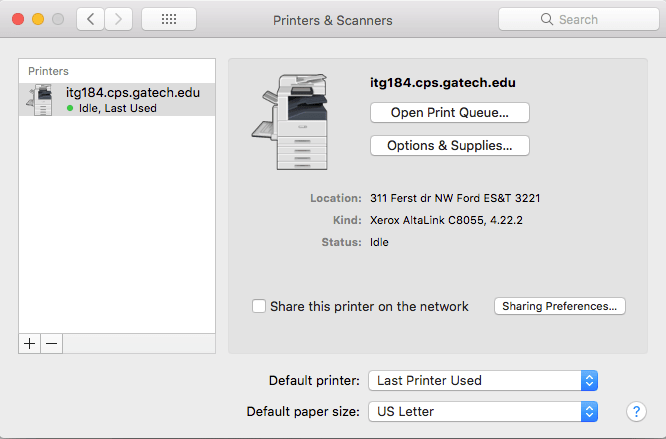
The School of Civil and Environmental Engineering has several high volume printers. Please follow the directions below to add a high volume printer to your system.

Unless noted you must be connected to a CEE wired network to print to the device.

  1. Download and install the Xerox Print Driver http://isg.ce.gatech.edu/drivers/Xerox Print Driver 4.22.2.pkg

  1. Launch the installer & follow the prompts to confirm the install and accept the license agreement. When you get to the portion of the installation for Select Printer, click the icon to the right (highlighted in red see thumbnail). Enter the address of the printer that corresponds to the printer you would like to install: – ES&T Main Office (  ) – itg184.cps.gatech.edu  – DEEL Main Office (DA103) – itg185.cps.gatech.edu – Mason Mail Room (M2125) – itg246.cps.gatech.edu – Mason 4th Floor (M4140) – itg248.cps.gatech.edu
  1. After the printer is installed you will see a confirmation screen where you will have the option to set the printer as your default and to print a test page. Click continue and then Close.
  1. Under System Preferences –> Printers & Scanners the new printer will now be available in your list of printers.

 A room number has not been assigned to the newly renovated office space.
 Open to wireless printing.

Account Depleted

If you have received this error while printing, “Job deleted because user account is depleted. Notify administrator before trying again,” consider the following solution.

  1. Open the settings for the printer you want to use.
  1. Make sure your “Xerox Black and White” option is enabled.
  1. Then enable the “print in grayscale” option.

Do we have any utilities for backing up the files on my Mac?

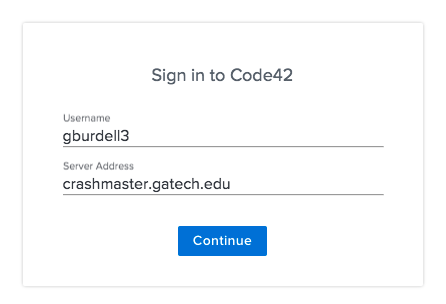
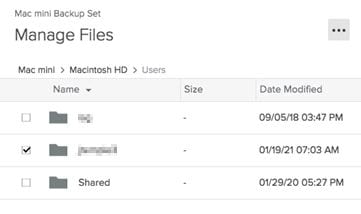
Backing up your files is extremely important and should always be done for any important documents. We use a utility called Code42 (previously called Crashplan).

  1. You can launch the installer from within the Georgia Tech Self Service app. If your system does not have this available you will need to register your Mac. Please review this FAQ page for instructions to register your Mac.
  1. Click install below the New Code42 icon to initiate the install if you have not installed Crashplan or Code42 previously.

Click Upgrade below the CEE – Upgrade Crashplan to Code42 to remove the previous version of Crashplan or Code42 and install the latest version of Code42.

  1. After install is complete you will need to sign in to begin backing up your documents. Use your GT Username and the Server Address of crashmaster.gatech.edu. Once you click Continue you will have an opportunity to enter your current GT Password. * If you receive an error message “Unable to sign in” please check your username, password and server address and then contact ISG at helpdesk@ce.gatech.edu to verify an account has been provisioned for your username.
  1. After you are logged in you can instruct Crashplan which files to backup from the settings menu.

Can someone help me remotely with my Mac?

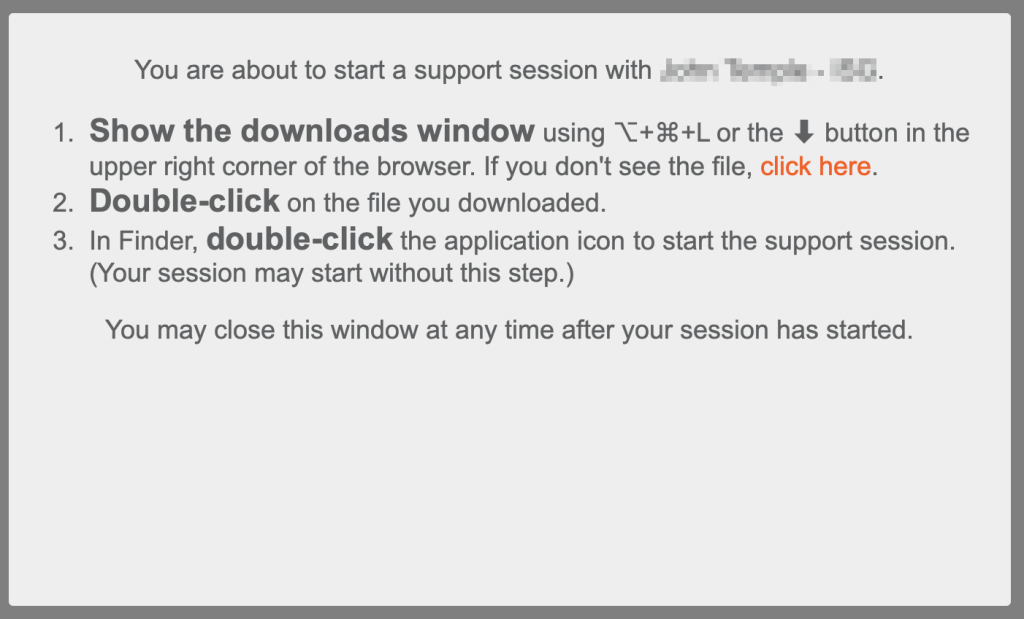
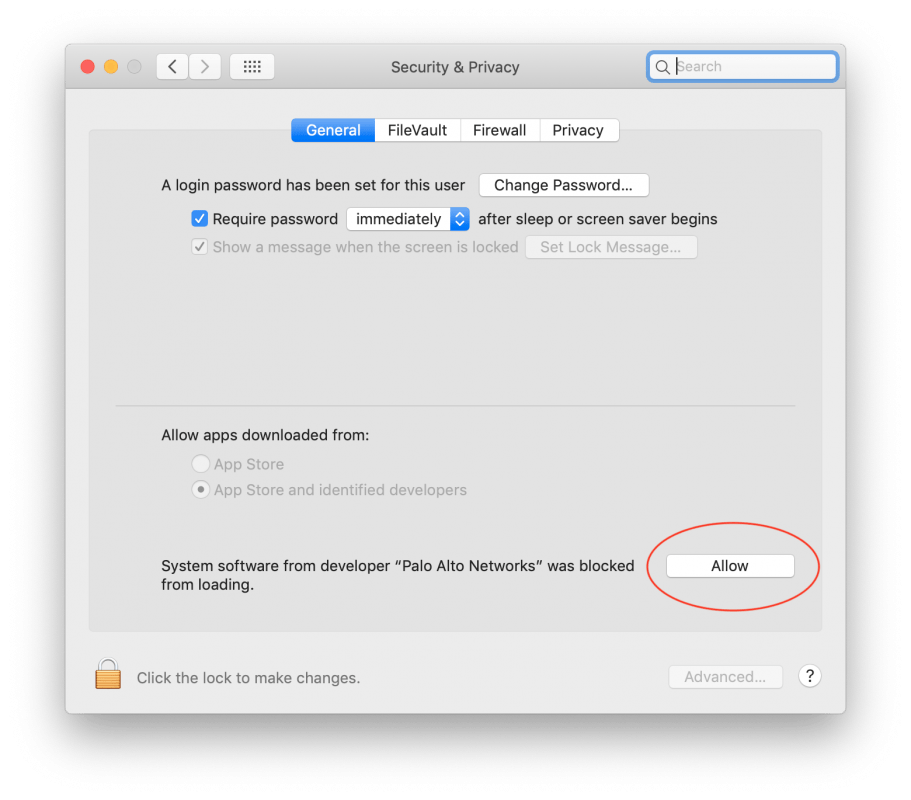
We use an application called BeyondTrust (Bomgar) to assist users remotely. Bomgar is compatible with Linux, Windows and Macintosh. On a Mac we will need to make a few adjustments to your Security Preferences to allow us to help you.

  1. To start off when you are communicating with a member of the ISG team you will be emailed a link, a session key or asked to navigate to https://remote.oit.gatech.edu and click on the name of the support rep that is assisting you.
  1. You will first need to download the agent to your system. The download will begin when you click on the link in an email from the representative assisting you or clicking on their name after going to the address listed in Step 1.

Windows License Issue

In accordance with campus anti-piracy measures, all GT systems are required to perform a check-in process once every 6 months to keep their Microsoft Windows and Microsoft Office licenses activated.

If you are a mobile user or have a GT system that remains off-campus for a significant duration of time, you will likely encounter the message shown in the image above at some point. This issue may be resolved by connected the system to the campus network. To do so, simply sign-in to the Cisco VPN client and allow the system to remain connected until the license or activation warnings subside.

All CEE systems should contain the Cisco VPN client which is accessible through the Windows Start menu.

How do I allow a System Extension Blocked on a Mac?

In some cases your Mac may prevent the system from loading a new system extension.

You may have only 60 seconds to perform this operation! If you fail to allow this extension quickly, the installation will be broken and you will have to reinstall.

  1. Click on “Open Security Preferences” when you see the System Extension Blocked warning.
  1. On the General tab for Security & Privacy settings screen click the “Allow” button next to the notice of the software that was blocked.

How do I find the hostname of my system?

If you need to connect to your system or an ISG member asks for the hostname of your system you can quicly find the name from the command line. The hostname of your system is in the form of machine_location-advisor-machine_number

Windows / Mac / Linux

From a command prompt or terminal type “hostname” without quotes and press enter.

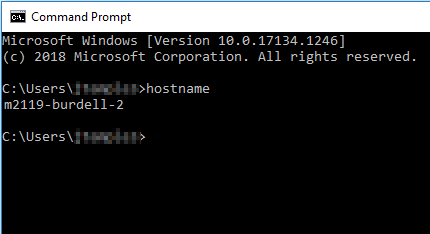
To access the Windows’ command prompt you can click on the Windows’ logo and type “cmd” without quotes and press enter.